This post is also available in: 日本語 (Japanese)
So, I recently beat the hidden final boss of Dungeon Antiqua on HARD mode by Shiromofu Factory, and I figured I’d leave some notes on how I got there.
For context, I also cleared the game on NORMAL all the way up to the main ending, so everything written here is confirmed to work on NORMAL as well.
If you’re stuck, unsure about party comps, or worried about a character’s long-term potential, I hope this helps make your run smoother.
I’ll try to avoid spoilers as much as possible, but given the nature of this write-up, a bit of unavoidable info will slip in—so if that’s a deal-breaker for you, now’s the time to hit that back button. Cool?
Alright then, let’s dive right in.
- Character Creation
- Early Game Tips
- Farming EXP
- Changing Your Alignment
- Boss Strategy
- Job Change Mechanics — Quick Rundown
- End Contents Guides
- B6F Is All About Burning Through Your Resources
- Watch Out for Gold Dragons and Their Petrify Breath
- And If All Else Fails? Just Grind Levels
- B6F — Ancient Demon Fight Guide
- Unlocking the Hidden Passage on B7F
- B7F Is a Full “No Normal Attacks” Zone
- If You Get Stuck Progressing Through B7F
- The Three Bosses of B7F
- B8F — No Magic Allowed
- B8F — Elder Dragon Fight
- B9F — The Ancient Weapons Battle
- B9F — The Fairy Battle
- In Closing
Character Creation
If your only goal is to clear the “main” game, just stick to the recommended setup + your favorites
When you start a new game, you’ll first jump into character creation.
Honestly, for your initial party, the tutorial’s suggested lineup—Warrior / Warrior / Thief / Priest / Mage—works perfectly fine.
Not just “good enough,” but actually optimal if you just want to breeze through the main story.
Sure, changing jobs later opens up better long-term growth, but here’s the catch:
re-leveling takes a lot of time, and most of the job-exclusive gear only drops in the post-game dungeon anyway.
If you change jobs around mid-game (say, around B3F), expect to spend roughly 30–45 minutes re-training that character.
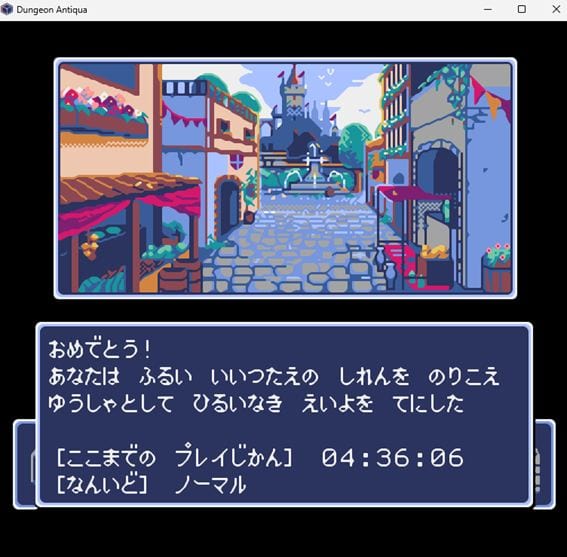
For reference, my first clear time for the main route on NORMAL was 4 hours and 36 minutes.
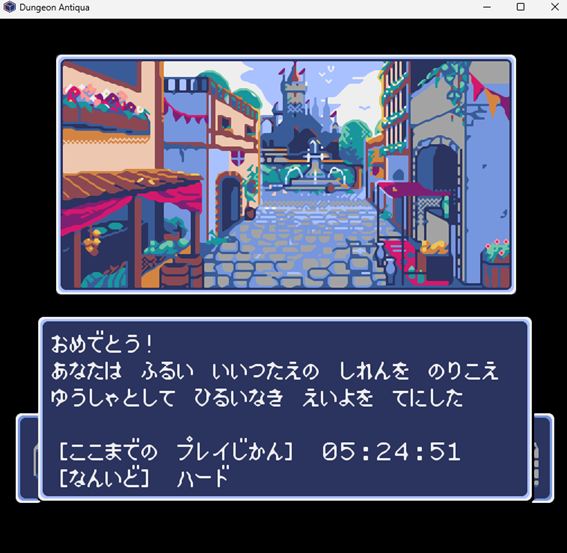
HARD was 5 hours and 24 minutes.
Since I ended up changing jobs on two or more characters in both of my runs, I spent roughly an extra hour total just on re-training.
With clear times on this scale, it’s honestly much faster to skip job changes entirely and push through with your raw levels and base power.
The higher your level, the more HP you get and the harder your basic attacks hit — so brute-forcing your way forward becomes surprisingly viable.
As for gender and alignment, if you’re not planning to dive into the post-game dungeon, feel free to pick whatever you like based on aesthetics or pure role-playing vibes.
You’re not going to run into any major issues.
And for those of you thinking, “Yeah, but I still want to know the optimal setup!!” — don’t worry.
I’ve got a separate post dedicated entirely to job and gender choices, so check that out if you want the full min-max breakdown.
Early Game Tips
Don’t hold back on magic
You might hesitate since most spells only get about 2 uses, but seriously—just spam them.
In particular, the Mage’s SLEEP and the Priest’s SILENCE are game-changers. Sleep can knock out roughly 40% of enemies at once, drastically lowering the threat level of a mob. If enemies aren’t attacking, you don’t need to heal, which saves your Priest’s spells and makes exploration way smoother. Silence is perfect against mobs that spam AoE attacks—it can basically neutralize them instantly.
Even the Fire 1 attack spell, though single-target, deals about 1.5–2x the damage of a frontliner. Use it smartly when the situation calls for it.
Dungeon Antiqua doesn’t have inns—just return to town to fully restore HP and spell uses. No need to pinch pennies on lodging.
Once your level 2 spells unlock, the Mage finally gets the coveted SPARK (AoE damage) and BIRD EYE (auto-move to explored tiles), massively boosting exploration efficiency. The Priest learns CURE (can heal paralysis and sleep) and keeps using SILENCE (AOE silence) effectively all the way through the post-game dungeon.
Even mid-post-game, your spell roster and limited uses basically define your max combat power. Keep that in mind and use your magic wisely.
Prioritize weapons over anything else
First targets: Priest’s Flail and Warrior’s Sharp Edge.
- With the FLAIL, your Priest can attack from the back row. Damage is roughly on par with a Thief, which boosts your overall kill rate and reduces total incoming damage—making longer explorations much safer.
- The SHRAP EDGE’s listed damage is only 2 higher than the LONG SWORD, but actual output is around 1.2–1.3x higher in practice.
Seriously, in this game, even the strongest weapon, MURASAME!, only lists 15 damage—so a +1 difference can be huge.
From testing, the listed damage seems to scale linearly with total damage if all hits land. For example, an 8-damage Sharp Edge vs. 15-damage Murasame roughly doubles your total damage if all attacks hit.
Status ailments don’t heal mid-battle (except Sleep)
Sleep wakes you if hit, but other ailments stick.
Paralysis or Silence can seriously mess you up.
Keep a few remedies handy for emergencies.
Once you get any resistance gear, equip it immediately. Note that most of these come pretty late in the game, though…
Farming EXP
The easiest way is to just circle around the healing spring and beat up the weak enemies that you can handle with basic attacks. It’s low effort and low stress.
Next-best option: head to the entrance of a slightly tougher floor, go all out with your spells, and return immediately once you run out. Not exactly relaxing, but it’s efficient in terms of time.
Once you reach B6F, you can do the classic Wizardry-style “Greater Demon Farm.” These demons give tons of EXP and summon friends, so you just keep letting them call reinforcements and then take them down for maximum EXP.
…That said, they also spam AoE ice attacks, so if you don’t have Ice resistance or decent HP, accidents happen. It’s not the safest Farming.
- Thieves can equip WINTER MITTENS or FROSTY CHAIN for Ice resistance, but back-row characters have it rough.
- Mages can use the WIZARD’S ROD to gain Ice resistance, but it’s one of the rarest items in the game.
- Priests and Bishops don’t have any Ice-resistant gear at all.
So yeah, in practice, your safest bet is still just farming the enemies you can see near safe zones and picking them off one by one.
Changing Your Alignment
- Good → Evil: Attack other adventurers inside the dungeon.
- Evil → Good: Help adventurers in the dungeon, or use the “Purify” option at the Salvation Temple. (The cost varies depending on your level—at Lv 54 it was around 100,000 G, so plan accordingly.)
It seems there’s no way to become Neutral, or to switch to/from Neutral once you’ve picked a side.
Boss Strategy
Spoiler warning: Don’t read this if you want to figure it out on your own!
B1F – Ancient Armor
What’s special:
- Hits everyone every turn with SPARK. There’s no AoE healing in Dungeon Antiqua, so you need to burst it down fast.
- It heals itself every turn and has high AC, dodging most of your physical attacks, making damage hard to stick.
How to handle it:
- Use the Mage’s DARKNESS (Lv2) or TERROR 1 (Lv3) to raise the enemy’s AC—this lets your physical attacks land. Honestly, if you skip the AC debuff, most physical attacks will basically do nothing.
- Mage attack spells are super effective here and can be relied on as a solid damage source.
B2F – Ancient Shield
What’s special:
- Keeps summoning minions for a long, drawn-out fight.
- High AC and really tanky.
- Uses a petrify attack at this stage, which you can’t really counter yet.
How to handle it:
- Just like Ancient Armor, AC debuffs work wonders.
- The Mage’s GOD FIST (Lv3) is reliable for consistent damage.
- Be careful: your spells barely touch the minions. Have your physical attackers focus on clearing the minions first, and only hit the Ancient Shield once the coast is clear for a much more stable fight.
B3F – Ancient Sword
What’s special:
- Absolute powerhouse of physical damage, even comes with instant death. When I faced it, my Warriors had 99 and 108 HP, and my Thief had 73—but it could casually hit for 50–100 damage. Ridiculous.
- At least it only does single-target attacks.
How to handle it:
- Stock up on POTION and have your Thief plus the two back-row characters focus entirely on healing while the two Warriors keep attacking.
- POTIONs and HEALING 2 restore about 20–25 HP each, so with three healers going full-time, you can keep up with the expected damage.
- Instant death is always a risk, so whether your Priest has REVIVE 1 (Lv4) makes a huge difference. If not, consider leveling up first.
B4F – Ancient Helm
What’s special:
- Comes with three Will-o’-Wisps as minions and stays in the back, out of reach of physical attacks, spamming magic nonstop.
- Uses CURSE 3, which drops a single target’s HP to 1, and AoE fire and ice attacks.
- After CURSE 3, the Will-o’-Wisps immediately follow up with pokes or AoE hits, making it a deadly combo.
How to handle it:
- The CURSE 3 → poke combo is the main threat, so prioritize taking out the Will-o’-Wisps first. Magic and debuffs barely work on them, so rely on physical attacks.
- The Ancient Helm itself isn’t too tough or hard-hitting, so just stay calm and deal steady damage.
B5F – Ancient Gloves
What’s special:
- You’ll be fighting two gauntlets at the same time.
- The top gauntlet uses AIR BLADE, dealing around 30 AoE magic damage and heavy single-target physical hits.
- The bottom gauntlet uses TERROR to debuff while healing itself, going for a long, tanky fight.
How to handle it:
- Use the Priest’s SILENCE (Lv2) or the ROD of SILENCE to shut down the top gauntlet’s magic—this stops its AoE attacks, making the fight way easier.
- Focus on taking out the top gauntlet first since it hits hard. The bottom gauntlet mostly just tanks and keeps reapplying debuffs, so even if you kill it, the fight doesn’t get that much easier.
Job Change Mechanics — Quick Rundown
So here’s how job changes work.
When you switch jobs, your level goes back to 1.
Your core stats—like Strength and Vitality—do carry over a bit, but most of them basically reset to whatever the new job requires. HP also drops to about 60% of what you had before.
Right after changing jobs, your HP growth is heavily restricted. For a while, you’ll only gain +1 HP per level. Once your level catches up to what’s considered “appropriate” for your current max HP, your HP starts going up normally again.
Unlike Wizardry, magic-users here share their spell slots: mage spells and priest spells come from the same pool.
When you change jobs, you keep all the spells you already learned. And your number of spell uses is set to the number of spells you’ve learned at each spell level.
End Contents Guides
B6F Is All About Burning Through Your Resources
Enemies on B6F are on a completely different level.
If you try to hold back, you’re not winning—simple as that.
Don’t hesitate to drop your big guns.
Feel free to cast your level-6 nukes—ANCIENT and PUNISH (both top-tier AoE spells)—in basically every single fight. That’s the mindset you need here.
One thing to remember: you can’t cast RETURN in B6F.
So early on, stick around the entrance and the nearby treasure spots, farm EXP and gear, and bail out before things get sketchy.
Silence continues to be MVP here. Both SILENCE the spell and the ROD of SILENCE work great for shutting down enemy casters, so keep using them whenever it helps.
Gargoyle groups (AoE ice attack + strong ice resistance) and female demon packs (AoE fire attack + strong fire resistance) are especially nasty. They tend to show up in large groups, they’re tanky, and sometimes even an ANCIENT won’t one-shot them.
Often it’s safer to SILENCE them first and then slug it out with melee. Just read the situation, understand what each enemy type does, and pick the safest kill route.
Watch Out for Gold Dragons and Their Petrify Breath
Gold Dragons usually appear in groups of three, and they’re pure trouble: they use AoE petrify breath and aren’t very vulnerable to ANCIENT.
Try to get petrify-resist gear on as many party members as possible, and give your frontliners a Dragon Slayer (dragon-slaying weapon) to help bring them down faster.
And If All Else Fails? Just Grind Levels
Not glamorous, but it works.
- As your Thief levels up, you’ll get fewer “junk” drops, speeding up your power growth
- Even without proper resist gear, sheer HP can let you survive and brute-force encounters
- Higher levels = higher total physical damage output = fights get way easier
So yeah—don’t get discouraged.
If you keep pushing and leveling, B6F becomes a lot more manageable than it first looks.
B6F — Ancient Demon Fight Guide
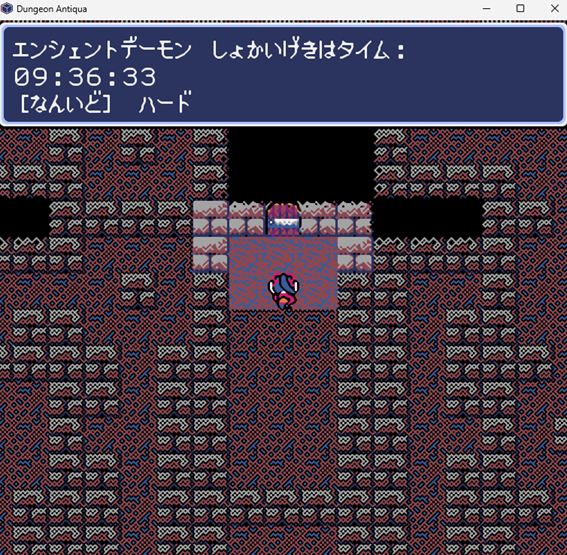
So, there’s this imposing “secret boss–looking” Ancient Demon lurking on B6F.
Step on the event tile and the fight begins:
you’ll be facing 3 Greater Demons plus the Ancient Demon himself.
The biggest headache here is the Greater Demons.
They spam AoE ice attacks and will keep summoning more of their buddies forever, so you really want to delete them ASAP.
Prepping some ice-resist gear beforehand makes the whole thing way smoother.
As for the Ancient Demon… yeah, he talks like some over-the-top battle maniac, but honestly? He’s not that strong.
Both the Greater Demons and the Ancient Demon are extremely vulnerable to SILENCE.
If SILENCE lands, they basically turn into punching bags. No joke.
After the fight, the game tells you how many turns you took to finish it, so if you’re into turn-count bragging rights, go wild.
For reference, even with my fully maxed-out party, the best I managed was 3 turns.
Unlocking the Hidden Passage on B7F
As the hint suggests, you’ll need to defeat all the Ancient Weapons solo (one-on-one), and then inspect the altar on B6F while carrying the full Ancient-series gear—the same !-marked spot required for the normal ending.
Do that, and a hidden passage on B7F opens up, letting you finally enter the floor.
B7F Is a Full “No Normal Attacks” Zone
On B7F, regular attacks are completely disabled.
That means pure Warriors and Thieves basically turn into item users for this stretch.
The good news? Enemies here are actually a bit weaker than the ones on B6F, so you can just mow them down with spells.
If You Get Stuck Progressing Through B7F
Minor spoiler (hover-to-reveal type in the original, so here’s the idea clearly):
If you cast LIGHT and then move to one of the spots where the teleporter forcibly sends you back, the “island” tiles that are normally hidden will light up.
Once you see them, just use the Teleport spell to warp onto those tiles, and you can move forward.
The Three Bosses of B7F
You’ll be facing all three of these guys at the same time.
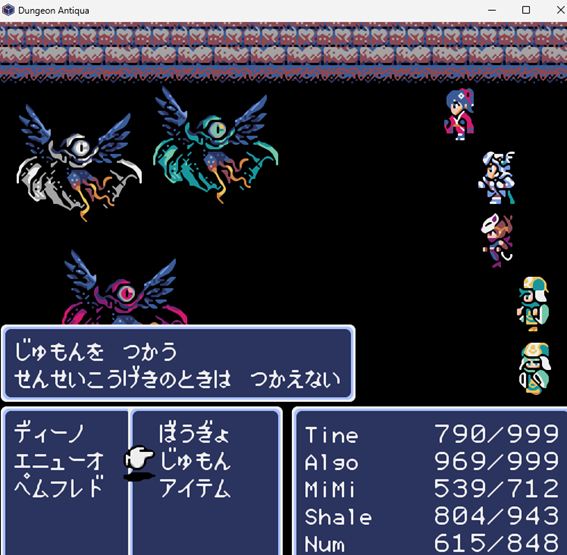
They spam AoE magic nonstop, and the red one at the bottom loves casting CURSE 3, which forcefully drops one party member’s HP to 1.
No matter how stacked your resist gear is, taking an AoE spell while sitting at 1 HP is basically instant death.
So the main objective of this fight is simple:
kill the red one before he deletes your party.
Each of the three has different weaknesses:
- Green — weak to Fire, Ice, and PUNISH
- White — weak only to Fire
- Red — weak only to ANCIENT
At first glance, spamming Fire (which works on both green and white) might seem like the natural plan.
But the real way you lose this fight is the CURSE 3 → touch → game over combo, so your actual priority is:
dump every ANCIENT you have into the red one until it dies.
Once the red guy is down, the rest is straightforward—just switch to Fire and burn the other two down.
B8F — No Magic Allowed
B8F is a whole floor where magic simply doesn’t work.
Pure casters are at a serious disadvantage here, so if you can, equip a FLAIL or similar weapon to at least chip in with melee attacks.
Enemies on this floor are ridiculously tough, and without magic, half-baked parties will get wrecked.
Level up around the healing springs, or boldly head back to B6F to farm some items and power up before pushing forward.
Even healing spells while moving are disabled, so stock up on PANACEA at the General Merchant before you enter.
The upside? These enemies give tons of experience, so if you grind here a bit, you might even hit the level cap just from fighting.
B8F — Elder Dragon Fight
Near the bottom stairs of B8F sits an Elder Dragon, flanked by two Gold Dragons, and you’ll need to take it down to move on.
As mentioned before, Gold Dragons spam AoE petrify breath, so make sure your party has petrify resistance ready.
Also, just like the NPC hint suggests, the Elder Dragon will resurrect fallen Gold Dragons nonstop.
So the strategy is simple: ignore the minions and dump all your firepower into the Elder Dragon first.
Once it’s down, the rest is much more manageable.
B9F — The Ancient Weapons Battle
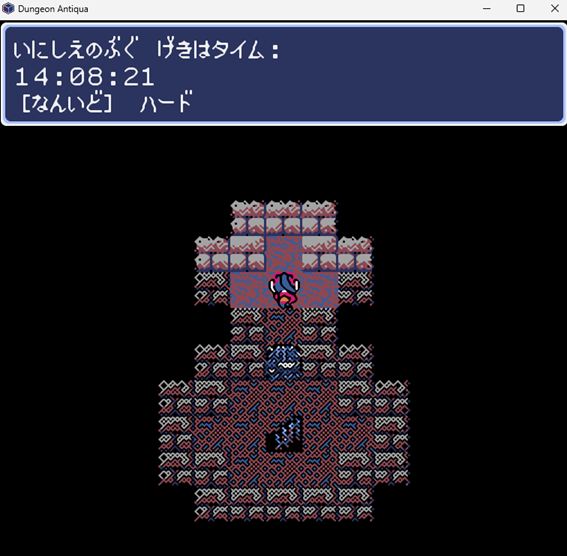
Right after entering B9F, you’ll face all five Ancient Weapons at the same time.
They seem slightly buffed overall, but aside from that, it’s not too different from fighting each one individually.
The first priority is to take down the Ancient Gloves and Ancient Armor.
Here’s why: the Ancient Helm in the back keeps casting CURSE 3, dropping a party member’s HP to 1. If those two front enemies are still alive, even minor damage could instantly kill someone.
Once you take out the Gloves and Armor, you can chip away at the rest safely while keeping everyone healed.
B9F — The Fairy Battle
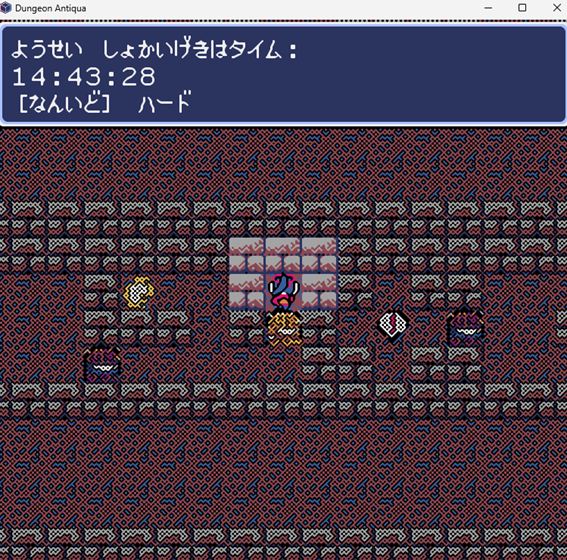
After defeating the Ancient Weapons, head to the right side, and it’s finally time to face the true secret boss of Dungeon Antiqua: the Fairy.
This fight is solo—only one character can fight at a time.
Healing items, especially PANACEA, are your lifeline here.
The Fairy takes two actions per turn, using Poison Breath, PUNISH, and TERROR 2.
With poison resistance, you can mostly handle the rest with straight-up melee combat.
And once you defeat the Fairy, checking the B9F map reveals a little surprise.
I’ll let you see that with your own eyes—it’s definitely worth it.
In Closing
So, what do you think?
I’ve laid out a quick walkthrough, but this is just one example—by no means the only way to tackle the dungeon.
I hope you readers will find your own unique path through Dungeon Antiqua and enjoy the adventure your way.
I’m also working on a full review of Dungeon Antiqua, so once that’s ready, definitely give it a read.
Anyway, enjoy your gaming life!
Thanks a ton for reading to the end!!!
