This post is also available in:
This is the third entry in my series about raising a Warder from scratch in Grim Dawn with absolutely no stored gear or resources.
In the previous entry, I progressed through the earliest quests while explaining how to decide which skills and gear to keep or discard.
This time, I will continue progressing through the quests until we clear Act 1 and enter Act 2.
The main focus of this play log will be the process of allocating skill points, the quests that you should absolutely complete, and the Rovers faction.
There will be spoilers for the Act 1 boss, so hit the back button now if you would rather avoid them!
- Make absolutely sure to complete the Blacksmith quest and the quest to rescue the Inventor’s Apprentice.
- I recommend siding with Angrim during the Blacksmith quest.
- The components sold by the Rovers are particularly useful.
All right, let’s get started.
- Leveling While Completing Quests
- Upgrading My Gear
- Continuing Through the Quests
- Essential Quest #1: The Blacksmith Quest
- If You Do Not Know Where to Go, Search the Unexplored Parts of the Map
- Blueprints Are Extremely Important Items
- My Damage Was Starting to Fall Behind, So I Invested More Points in Torrent
- Essential Quest #2: Rescuing the Inventor’s Apprentice
- How to Craft Equipment
- Finding a Weapon That Is Practically Made for Primal Strike
- Defeating the Act 1 Boss, Warden, and a Useful Trick for Creating a Retry Point
- Clearing Act 1 Unlocks Access to a DLC Area
- Progressing Through Act 2
- Clearing the Path with Dynamite
- Increasing My Reputation with the Rovers
- My Soldier Skills After Clearing the Path with Dynamite
- Summary
Leveling While Completing Quests
When I reached level 12, I raised the Shaman Mastery Bar to 25 and invested one point in Storm Surge.
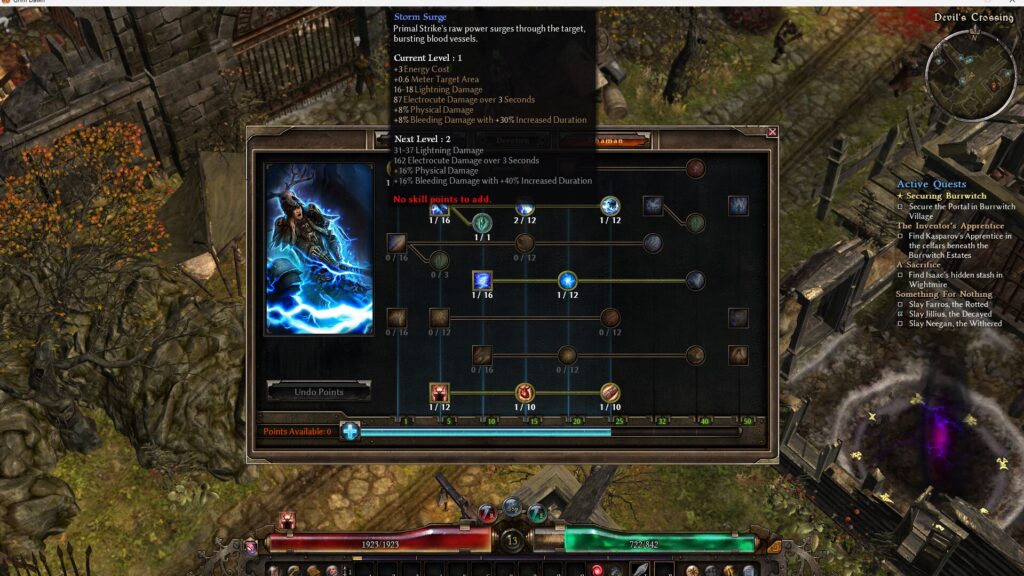
This skill increases both the area of effect and damage of Primal Strike while also adding an electrocute damage-over-time effect.
At level 13, I acquired the following skills:
- Mogdrogen’s Pact
- Heart of the Wild
- Oak Skin
Mogdrogen’s Pact
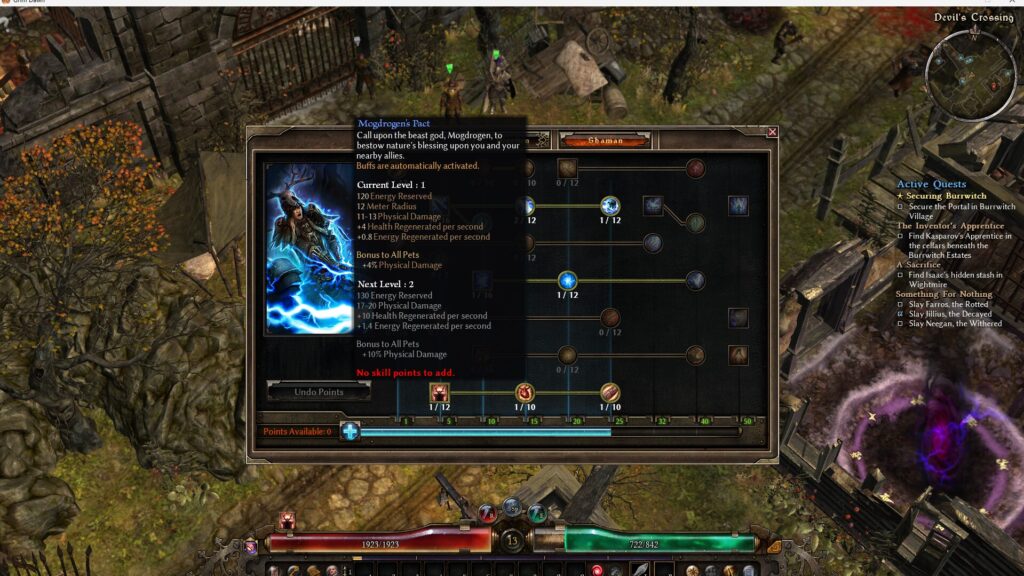
I took Mogdrogen’s Pact primarily for the increased Health Regeneration and Energy Regeneration.
Heart of the Wild
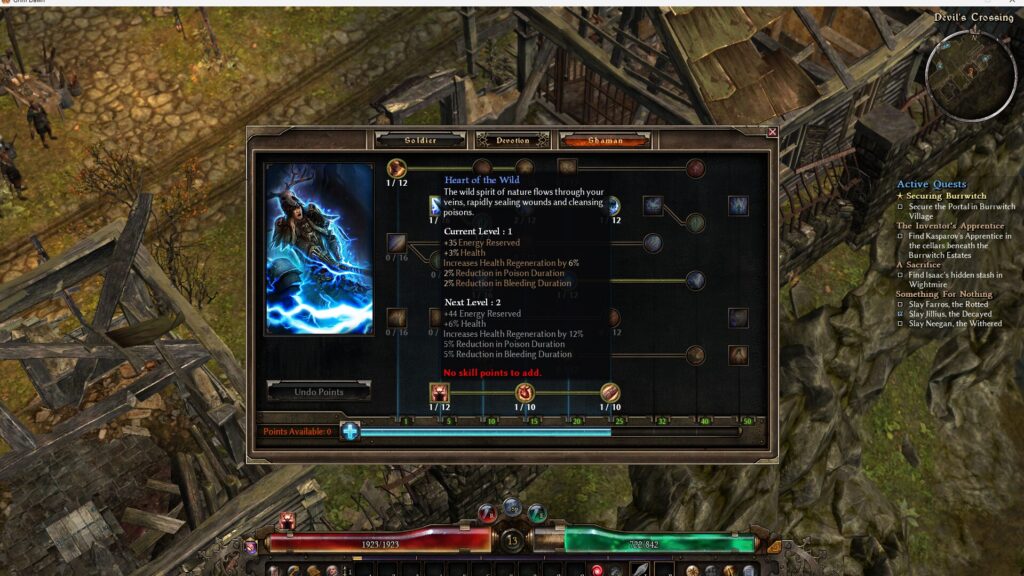
Heart of the Wild further increases my maximum Health and Health Regeneration.
The reduced Poison duration and Bleeding duration are… probably not things I desperately need… I think?
Oak Skin
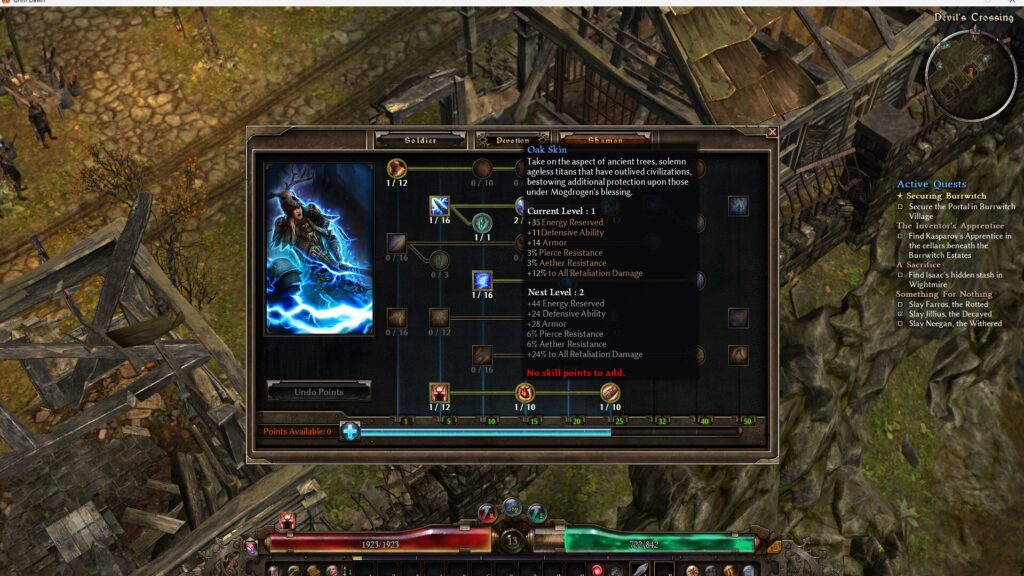
The purpose of taking Oak Skin is to increase my Armor and Defensive Ability while also securing some Pierce and Aether Resistance.
By investing even a single point in skills that improve both my offensive and defensive capabilities, the build has become noticeably more stable.
From this point onward, I will mainly invest in skills on the Soldier side.
Upgrading My Gear
Finding a Crossbow for Elemental Attacks
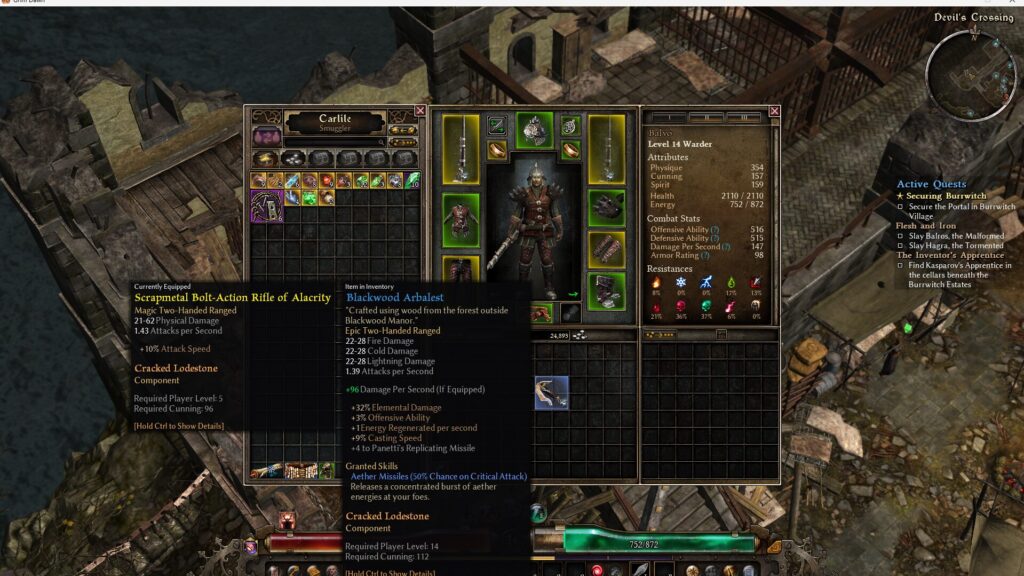
While progressing through the quests, I found a promising crossbow, so I switched over to it.
It came with:
- A massive +32% Elemental Damage modifier
- +3% Offensive Ability, increasing my Critical Hit chance
- +1 Energy Regeneration
It was an excellent piece of equipment with practically no wasted stats.
After switching to it, my damage increased dramatically.
As for its Energy efficiency… honestly, I could not really feel much of a difference.
A Belt with Pierce Resistance
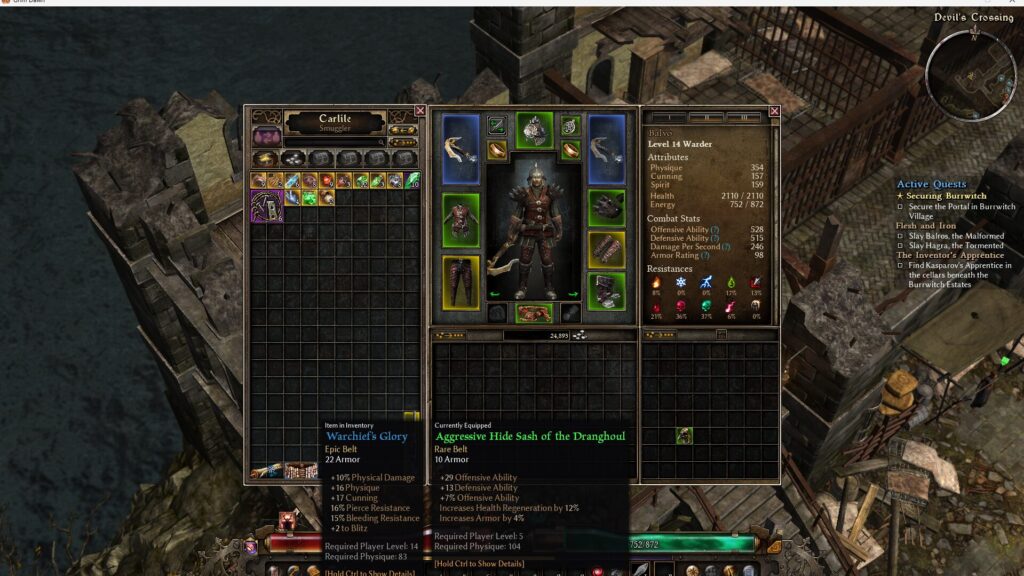
I found a belt with high Pierce and Bleeding Resistance.
During Act 1, you barely need to worry about resistances in Grim Dawn.
The moment you enter Act 2, however, resistances suddenly become much more important.
In particular, the difficulty of Act 2 can change considerably depending on how much Pierce Resistance you have.
I equipped this Pierce Resistance belt as a form of early investment in preparation for what was coming.
Continuing Through the Quests
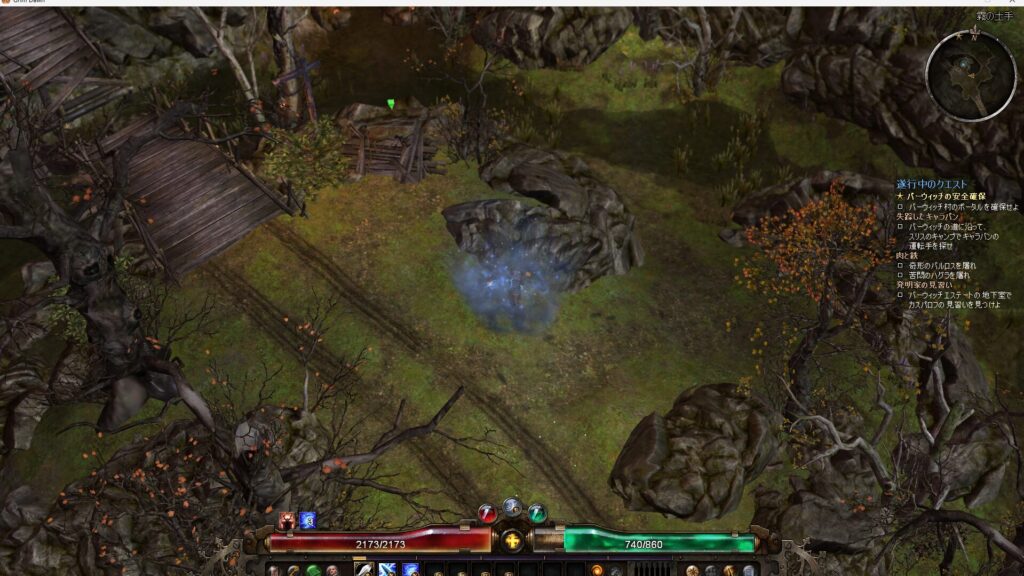
When you follow the instructions given by the person in charge of the settlement and head toward Burrwitch, you will eventually come across a destroyed bridge.
You can open a shortcut here by spending three Scrap and 5,000 Iron Bits, but…
Personally, I recommend taking the longer route through the cave on the right.
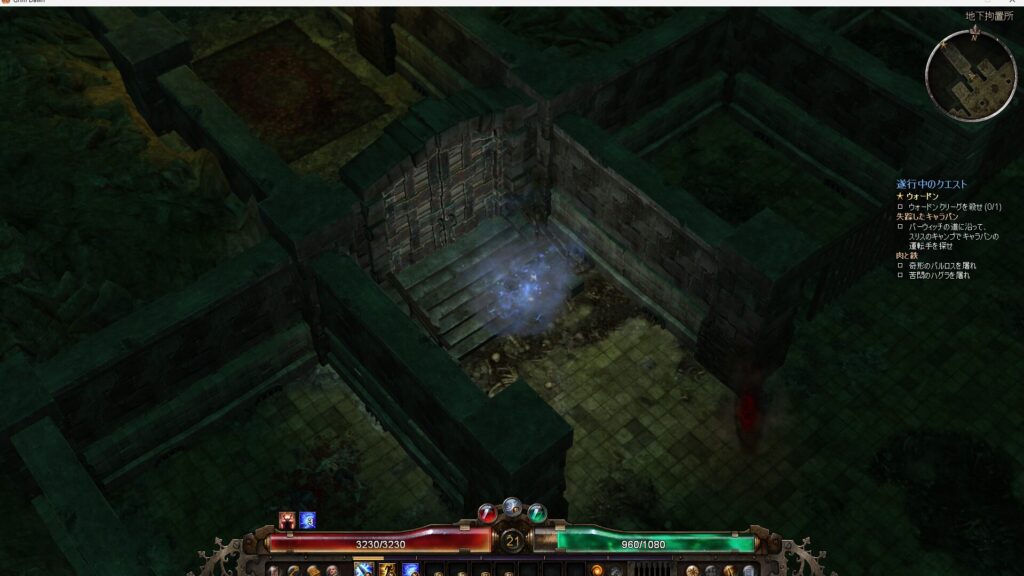
There is a Devotion Shrine and a boss inside the cave, allowing you to earn a Devotion Point, items, and experience along the way.
It is a much more rewarding route.
As shown in the video, you can defeat the boss simply by keeping your distance and firing Primal Strike at it.
Thanks to the Electrocute damage over time from Storm Surge and the autonomous attacks of Wind Devil, you can deal plenty of damage even while using a hit-and-run strategy where you attack once and then flee.
Essential Quest #1: The Blacksmith Quest
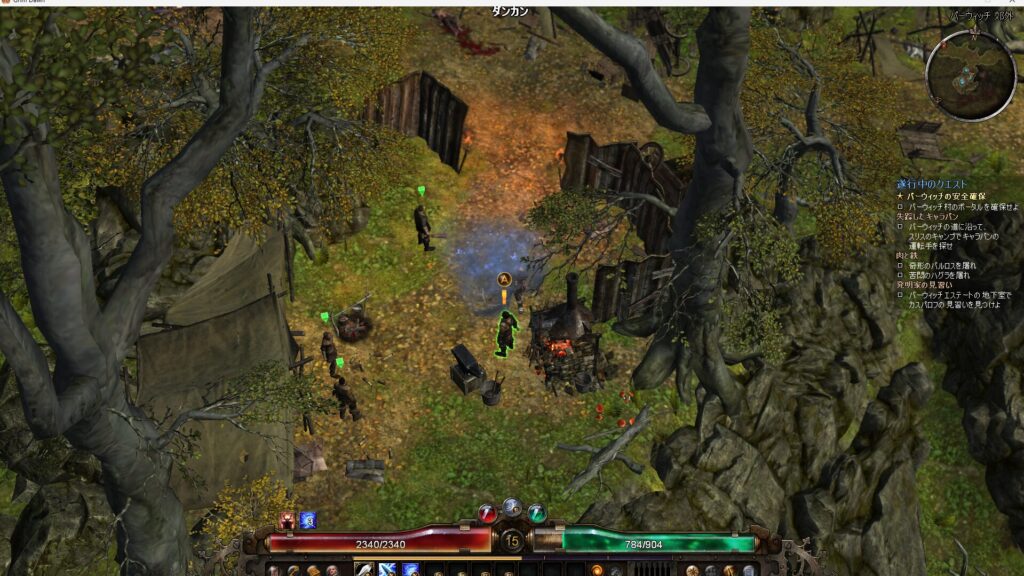
One quest that you should complete at all costs is the Blacksmith quest.
After leaving the cave mentioned earlier, head to the right, and you will find an NPC who offers you the quest.
Accept the request and search for Angrim the Blacksmith.
Completing this quest unlocks the Blacksmith crafting service at Devil’s Crossing.
If you leave this quest unfinished, you will be unable to use the Blacksmith system itself until around the middle of the main campaign.
Make absolutely sure that you complete it.
Fortunately, the quest itself is simple.
You only need to travel a considerable distance east from the place where you accepted the quest and speak to Angrim the Blacksmith.
At that point, however, you will be given a choice.
I Recommend Siding with Angrim During the Blacksmith Quest
After speaking to Angrim, you must choose whether to side with Duncan or Angrim.
To get straight to the point, siding with Angrim is the more beneficial choice.
If you side with him, Angrim becomes the resident Blacksmith at Devil’s Crossing.
Whenever he crafts equipment for you at Devil’s Crossing, the resulting item can randomly receive an additional bonus to one of the following:
- Physique
- Armor
- Pierce Resistance
All three are useful attributes that will never become completely irrelevant.
From a gameplay perspective, you are better off siding with Angrim without worrying too much about the finer details.
If You Do Not Know Where to Go, Search the Unexplored Parts of the Map
When you no longer know where to go during a quest, carefully read the quest description and check the name of the location it mentions.
Then, start filling in the unexplored sections of the map around that area.
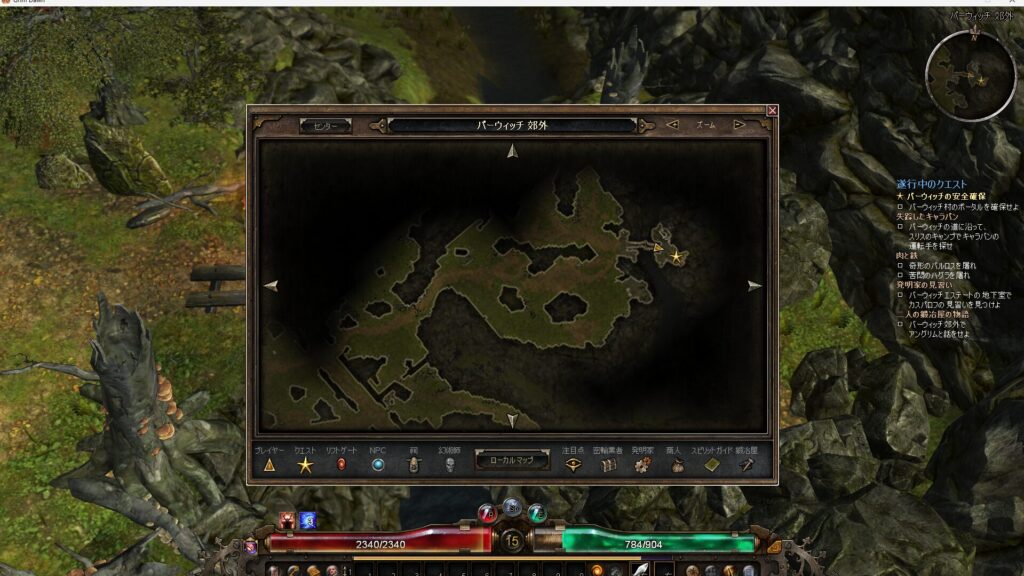
The sections of the local map that are still covered in black, as shown here, are unexplored areas.
If a star icon appears on your minimap while exploring, simply make your way toward it.
Blueprints Are Extremely Important Items
The Blueprints that occasionally drop are extremely important items.
By using one with the Y button, you can learn a new crafting recipe that can then be commissioned from a Blacksmith.
Once you have learned a recipe, you can obtain powerful equipment suited to your character without being completely dependent on random drops.
Recipes are also shared between characters.
If you collect Blueprints with one character, raising any future characters will become considerably easier.
Remember that you still cannot craft anything at Devil’s Crossing until you complete the Blacksmith quest!
My Damage Was Starting to Fall Behind, So I Invested More Points in Torrent
By the time I reached level 16, my damage was starting to feel slightly underwhelming.
I invested three additional points in Torrent, bringing it up to level 5.
That alone increased the damage of the chaining lightning effect by roughly 2 to 2.5 times.
The improvement to my ability to clear groups of enemies was immediately noticeable.
Unfortunately, the damage I was taking was also starting to become more painful…
However, the situation changed dramatically after I advanced the Toad constellation at a Devotion Shrine in Burrwitch.
This gave me an ability that converts a portion of the damage I deal into Health.
On the Wiki and within the community, this mechanic is commonly called ADCtH, meaning Attack Damage Converted to Health.
In other words, I had effectively gained a passive life-drain ability.
Grim Dawn is designed with relatively few active healing options.
As a result, the majority of your healing will usually depend on either ADCtH or Health Regeneration.
Unless you are playing a pet build that leaves all the fighting to summoned creatures, you will almost certainly rely on ADCtH at some point.
Essential Quest #2: Rescuing the Inventor’s Apprentice
In the Dank Cellar located in Burrwitch, you can rescue Darlet.
Completing this quest unlocks several useful functions, including:
- Removing components from equipment
- Transmuting set items into different pieces from the same set
- Dismantling items to obtain components
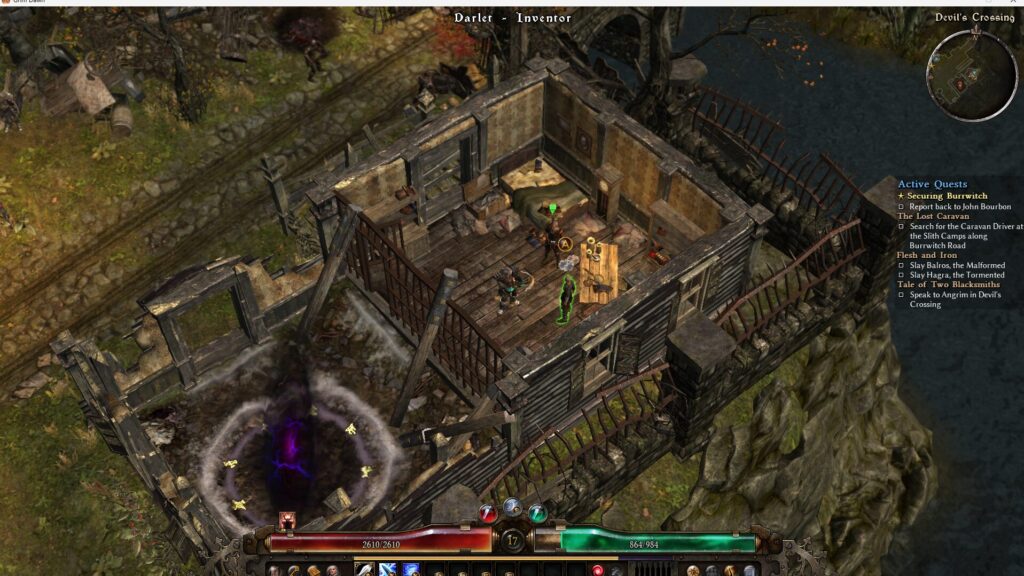
You can use these functions by speaking to Darlet.
These services are essential pieces of infrastructure in Grim Dawn, so make absolutely sure that you complete this quest.
How to Craft Equipment
I found the recipe for a pair of trousers called Explorer’s Trousers, so I decided to craft them immediately.
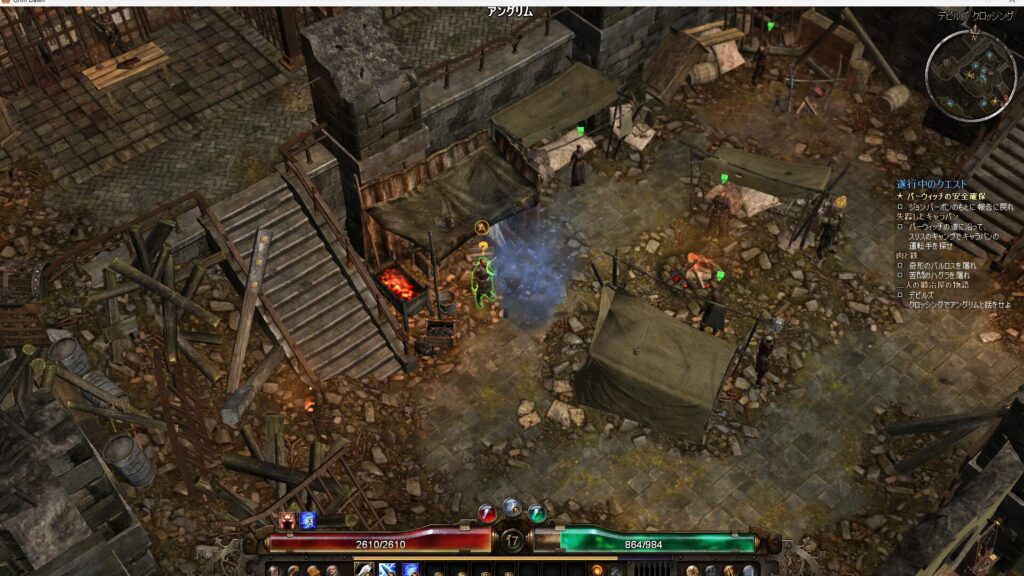
Once you have completed the Blacksmith-related quest, a Blacksmith will appear at this location in Devil’s Crossing.
Speak to him.
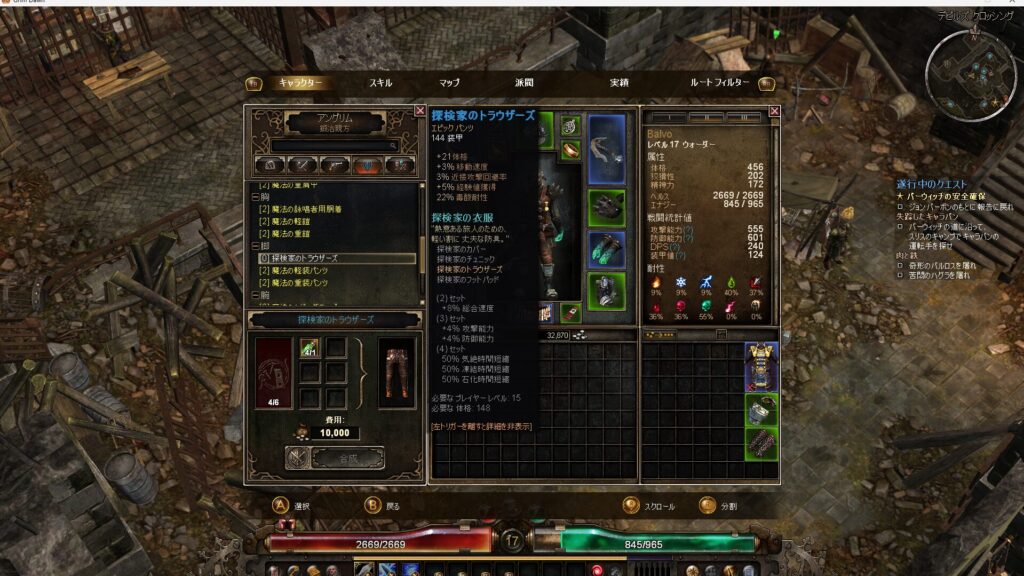
Select the category containing the item you want him to craft.
The game will show you the required materials and Iron Bits, which you can then spend to create the equipment.
The item I crafted this time received an additional +2% Armor bonus, which was a nice little benefit.
Finding a Weapon That Is Practically Made for Primal Strike
As I continued toward the boss located deeper within Burrwitch, I happened to find a weapon that could not possibly have been a better fit for a Primal Strike build.
It had:
- Extremely high Lightning Damage
- An extremely high Lightning Damage modifier
- An extremely high Electrocute Damage modifier
- 41% Physical Damage converted to Lightning Damage
- A bonus to Offensive Ability
- +4 to the skill level of Primal Strike
- A 33% chance to unleash an additional lightning attack on a Critical Hit
It was absolutely overflowing with Lightning-related bonuses, and it even increased the skill level of Primal Strike.
On top of that, it included damage conversion, one of the fundamental mechanics at the heart of this game.
There was absolutely no reason not to use such a divine weapon, so I excitedly equipped it.
Defeating the Act 1 Boss, Warden, and a Useful Trick for Creating a Retry Point
It was finally time to fight Warden, the boss of Act 1.
Here is a useful little tip.
If you return to town while standing directly outside the boss room, your Personal Rift will remain fixed at that location.
After dying, interact with the Riftgate near the settlement, and you can immediately return to the Personal Rift that you placed earlier.
In other words, you can create a retry point directly outside the boss room.
Give it a try!
I failed to record the first phase, so the video only shows the second phase.
I had raised my Soldier Mastery and acquired Blitz, but I did not end up using it very much.
Thanks to the axe that massively enhanced Primal Strike, along with the huge amount of Health and Armor I had accumulated, I managed to defeat Warden on my very first attempt.
To be completely honest, I had lost to Warden at least 15 times with the Purifier I had been playing before this character.
He went down so much more easily than I expected that I was almost disappointed.
Can you believe it…?
When I was playing the Purifier, Warden’s projectile attack could kill me in a single hit even while I was standing on top of Inquisitor Seal…
This fight made me realize just how straightforwardly powerful Health, Armor, and raw damage can be.
Clearing Act 1 Unlocks Access to a DLC Area
After defeating Warden and clearing Act 1, an NPC who can guide you to a DLC area appears near the entrance of Devil’s Crossing.
There are both advantages and disadvantages to entering this DLC area at this point in the game, so let us organize them here.
Advantages of Entering the DLC Area
You can obtain powerful DLC-exclusive equipment with relatively little effort.
For this particular build, that includes items such as the Korvan Storm Halberd.
Disadvantages of Entering the DLC Area
If you gain too many levels in the DLC area or in the Shattered Realm, a dungeon system unique to the DLC that is commonly abbreviated as SR, enemies in later areas may stop dropping certain rare items.
You may also find it harder to earn faction reputation, delaying your access to useful items and potentially creating extra work later.
In addition, an important character from the story may be replaced by a substitute.
As a result, some conversations and developments can become slightly confusing during that difficulty’s playthrough.
Personally, I recommend saving the DLC until after completing the main campaign if you care about following the story properly.
If the story is not important to you, it is perfectly fine to enter the DLC area and farm powerful equipment.
Just be careful not to overlevel.
Otherwise, you may create additional work for yourself when it comes time to raise faction reputation.
Progressing Through Act 2
To enter the Act 2 area known as the Arkovian Foothills, you need to carry six Scrap and 3,000 Iron Bits.
Then, investigate the debris blocking the road northwest of the settlement.
Clear the path there to begin progressing through Act 2.
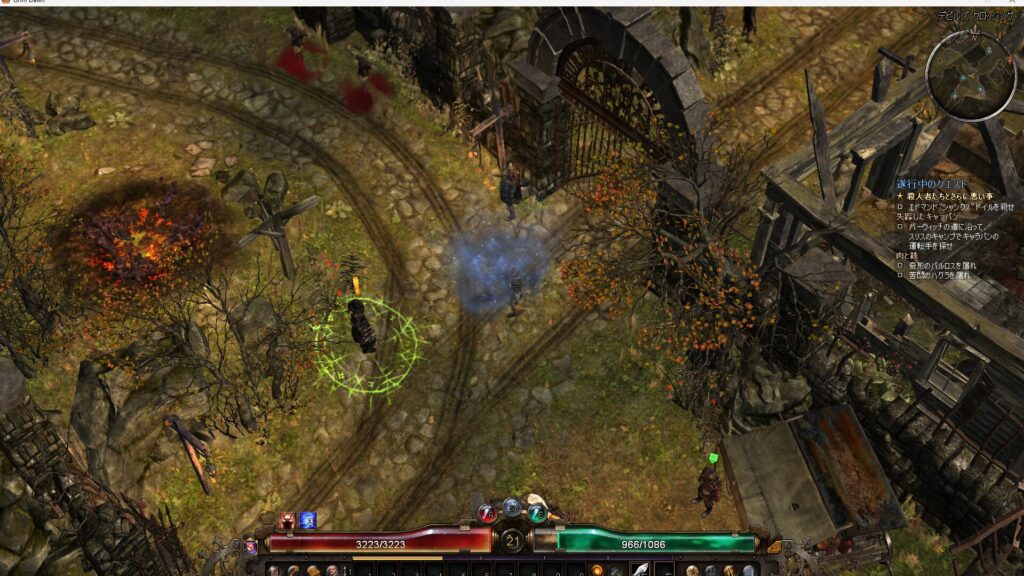
The video shows what combat looks like when using Blitz and Primal Strike together.
Blitz compensates for the classic weakness of melee builds: being vulnerable while trying to close the distance.
It does this by giving you an overwhelmingly powerful charge.
Its movement function works perfectly well even at skill level 1, so investing a single point is enough.
Its damage is also surprisingly high.
It can scatter nearby enemies while you charge into the middle of them.
Clearing the Path with Dynamite
After defeating the first boss, you will need to use Dynamite to destroy an obstacle blocking the road.
Dynamite can be collected from treasure chests found in the many mines scattered throughout Act 2.
Increasing My Reputation with the Rovers
Act 2 contains a base belonging to the Rovers faction.
By increasing your reputation with them, you can purchase their unique equipment and Blueprints.
Two items that I can recommend to practically anyone are the component Blueprints for Restless Remains and Mark of Mogdrogen.
Restless Remains is a component that can only be applied to hand armor and grants ADCtH.
Mark of Mogdrogen is a component for boots that improves maximum Health, Health Regeneration, and Movement Speed.
All three are universally useful attributes that will never become obsolete.
Both components are good enough to be used even on endgame equipment, yet they become available relatively early.
You will be relying on them for a very long time.
Should your character’s Mastery combination include Occultist, raise your reputation and make sure to purchase the Rhowari Cord belt.
At this stage of the game, equipment that grants “+1 to All Skills in Occultist” offers exceptionally powerful value.
My Soldier Skills After Clearing the Path with Dynamite
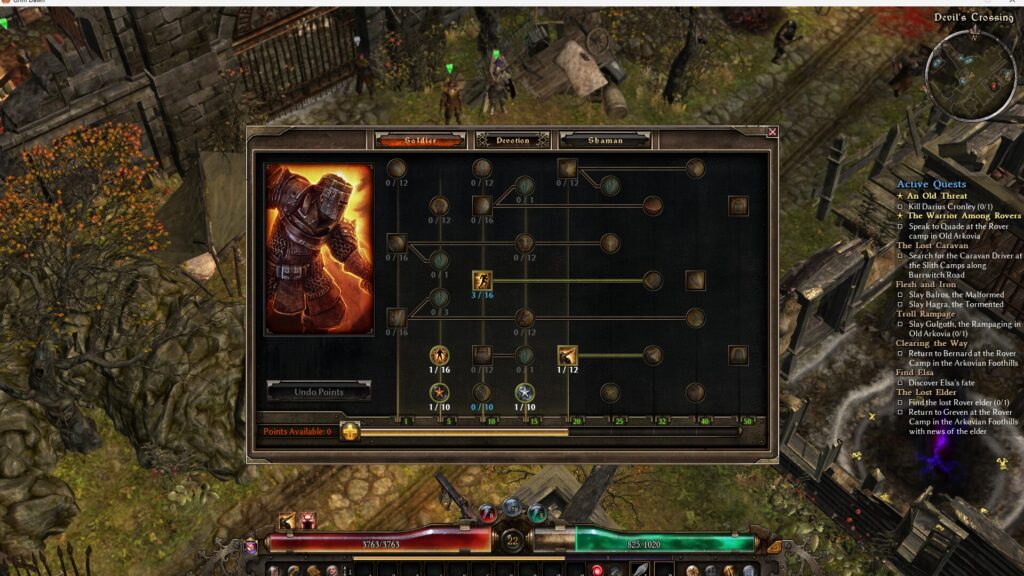
I raised the Soldier Mastery Bar to 20 and invested one point in each of the following:
- Menhir’s Will, which automatically provides emergency healing when my Health becomes low
- Military Conditioning, which increases Physique and Health
- Veterancy, which increases Health Regeneration
- Field Command, which provides a permanent bonus to Offensive Ability, Defensive Ability, and Armor
These investments improved my overall combat capabilities.
From here, I will work toward Squad Tactics and Blindside, which become available at Soldier Mastery level 32.
Incidentally, my equipment is granting +2 to Blitz, which is why its displayed skill level is currently 3.
I have not invested any additional points in my Shaman skills since the setup described earlier, so I will omit them here.
Summary
My combat capabilities are steadily improving, and the leveling process is progressing smoothly.
Among all the classes I have played so far, Warder has given me a particularly strong impression of being extremely durable and easy to control.
It also places very few restrictions on how you need to position or move during combat.
To finish, here are the main points from this entry:
- Make absolutely sure to complete the Blacksmith quest and the quest to rescue the Inventor’s Apprentice.
- I recommend siding with Angrim during the Blacksmith quest.
- The components available from the Rovers faction are particularly useful.
It feels like I am reaching the stage where I will need to start increasing my damage and survivability according to the situation.
I will also include a link to Grim Tools.
Enjoy your gaming life!!
Thank you so much for reading to the end!!
